Stop settling for that translucent, flavorless sludge found in the back of your pantry. We are here to engineer a masterpiece of liquid fire. True Homemade Chili Oil is not merely a condiment; it is a structural achievement of lipid-based flavor extraction. Imagine a viscous, crimson suspension where every droplet carries the piquant sting of toasted capsaicin and the deep, nutty resonance of scorched aromatics. When you drizzle this over a bowl of steaming noodles, the heat should not just burn; it should bloom. We are targeting a specific molecular synergy where the oil acts as a solvent, pulling every ounce of pigment and essential oil from the dried husks of the peppers. This is about the crunch of the sediment and the clarity of the infusion. If your current oil lacks that signature "shatter" when you bite into the fried garlic, your infrastructure is failing you. We are going to audit your process, recalibrate your temperatures, and build a jar of liquid gold that puts commercial brands to shame.
THE DATA MATRIX
| Metric | Specification |
|---|---|
| Prep Time | 20 Minutes |
| Execution Time | 45 Minutes |
| Yield | 500ml / 2 Cups |
| Complexity (1-10) | 4 |
| Estimated Cost per Serving | $0.12 |
THE GATHERS
Ingredient Protocol:
- Neutral High-Smoke Point Oil (Canola or Grapeseed): 500ml / 2 cups
- Sichuan Chili Flakes (Gochugaru or Crushed Red Pepper): 100g / 1 cup
- Star Anise: 3 whole pods
- Cinnamon Stick: 1 stick / 3g
- Bay Leaves: 3 leaves
- Sichuan Peppercorns: 15g / 2 tbsp
- Fresh Ginger: 50g / 2-inch knob, sliced
- Garlic Cloves: 6 cloves, smashed
- Shallots: 2 large, thinly sliced
- Toasted Sesame Seeds: 15g / 2 tbsp
- Fine Sea Salt: 5g / 1 tsp
Section A: Ingredient Quality Audit:
The primary failure point in Homemade Chili Oil is stale pepper flakes. If your chili flakes are dusty or brown, your oil will taste like cardboard. Technical Fix: Always source vibrant, bright red flakes. If you only have access to whole dried chilies, use a high-speed blender to pulse them into a coarse meal. Another common issue is moisture in the aromatics. If your garlic or shallots are damp, they will cause the oil to sputter and steam rather than fry. Technical Fix: Use a kitchen towel to thoroughly dry all fresh aromatics after slicing. This ensures a clean Maillard reaction without the risk of microbial growth in the finished product.
THE MASTERCLASS
Step 1: The Aromatic Infusion
Place your neutral oil in a heavy-bottomed saucier or small pot. Add the ginger, garlic, shallots, star anise, cinnamon, bay leaves, and peppercorns. Turn the heat to medium-low. You are looking for a gentle simmer, not a violent boil. The goal is to render the moisture out of the aromatics while pulling their essential oils into the lipid base.
Pro Tip: Use a digital probe thermometer to maintain an oil temperature between 225F and 250F. This range is the "sweet spot" where aromatics brown slowly without becoming bitter or acrid.
Step 2: Preparing the Chili Bed
While the oil infuses, place your chili flakes, salt, and sesame seeds into a large heat-proof glass or ceramic bowl. Do not use plastic; the high heat will cause leaching or melting. Arrange the flakes so they have maximum surface area exposure.
Pro Tip: Use a bench scraper to neatly transfer sliced shallots and garlic into the oil, ensuring uniform thickness for even frying. Consistency in size leads to consistency in texture.
Step 3: The Thermal Extraction
Once the shallots and garlic in the pot are a deep golden brown, use a slotted spoon to remove all solids. Discard the spices but keep the fried garlic and shallots if you want extra crunch. Increase the oil heat to 375F. Carefully pour the hot oil over the chili flakes in three stages. The oil should bubble vigorously (the "bloom").
Pro Tip: This staged pouring prevents the chili flakes from scorching. The first pour initiates the infusion, while the subsequent pours stabilize the temperature for a deeper color extraction.
Step 4: The Cooling Phase and Sediment Integration
Stir the mixture gently with a metal spoon to ensure all flakes are submerged. Allow the oil to cool completely at room temperature. As it cools, the sediment will settle, and the oil will take on its characteristic deep ruby hue.
Pro Tip: Do not cover the bowl while it is hot. Condensation will form on the lid and drip back into the oil, which introduces water and creates a breeding ground for bacteria.
Section B: Prep & Timing Fault-Lines:
The most frequent error is the "Flash Burn." If your oil is too hot (above 400F) when it hits the chilies, they will turn black instantly, resulting in a bitter, burnt profile. Conversely, if the oil is too cool (below 300F), the chilies will simply soak up the oil without releasing their pigment or flavor. Technical Fix: If you see the flakes turning dark brown immediately, stop pouring and add a splash of room-temperature oil to the bowl to crash the temperature. Timing is everything; use a stopwatch to track your aromatic fry-down.
THE VISUAL SPECTRUM
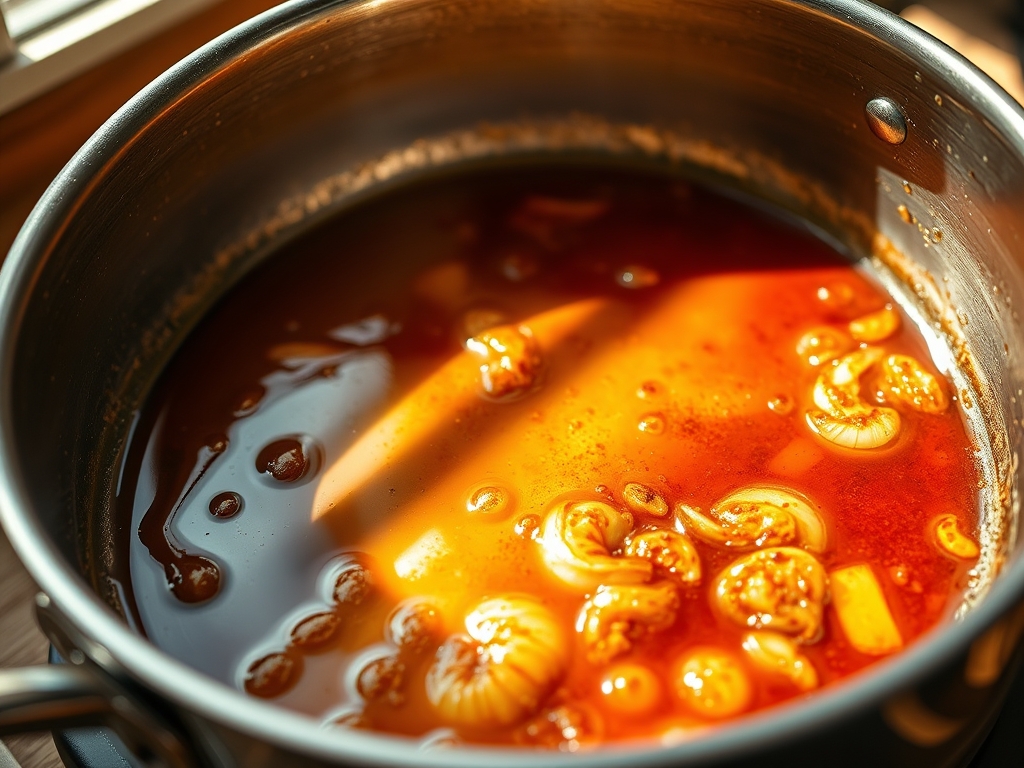
Section C: Thermal & Visual Troubleshooting:
Referencing the Masterclass photo above, notice the viscous clarity of the oil and the distinct separation of the sediment. If your oil looks cloudy, you likely have residual moisture from the aromatics. Solution: Filter the oil through a fine-mesh sieve and briefly reheat to 220F to evaporate any remaining water. If the color is orange rather than ruby, your infusion time was too short. Next time, let the flakes steep in the warm oil for at least 24 hours before moving to cold storage. If your garlic is pale rather than golden, it will be chewy instead of crunchy. Ensure you achieve that specific "honey-gold" visual cue before straining.
THE DEEP DIVE
Macro Nutrition Profile
Per tablespoon (15ml), this oil is almost entirely lipid-based, providing approximately 120 calories. It is rich in Capsaicin, which is known to boost metabolic rate, and contains trace amounts of Vitamin A and E from the chili peppers.
Dietary Swaps (Vegan/Keto/GF)
This recipe is naturally Vegan, Keto, and Gluten-Free. To enhance the "Umami" profile for a Keto diet, you can add a teaspoon of dried mushroom powder to the chili flakes before the oil pour. For a soy-free alternative to traditional chili crisps, ensure your salt levels are calibrated correctly to provide that savory punch.
Meal Prep & Reheating Science
Homemade Chili Oil is shelf-stable for about 2 weeks at room temperature, but for long-term molecular stability, store it in the refrigerator for up to 6 months. Cold storage prevents the fats from going rancid. Note that some oils may partially solidify in the fridge; simply let the jar sit at room temperature for 10 minutes to restore its flow. Do not microwave the jar, as uneven heating can degrade the delicate aromatic compounds.
THE KITCHEN TABLE
Why is my chili oil bitter?
Bitterness usually stems from scorched chili flakes or over-fried garlic. Ensure your oil does not exceed 375F during the pour. If the garlic turns dark brown, it has moved past the Maillard stage into carbonization.
Can I use fresh chilies instead?
Fresh chilies contain high water content, which prevents the "crunch" and significantly reduces shelf life. For the best infrastructure, stick to dried flakes to ensure a concentrated, shelf-stable infusion.
How do I make it spicier?
The heat level depends on the pepper variety. For more "kick," use Thai Bird's Eye chili flakes. For more "numbness," increase the ratio of Sichuan peppercorns. The oil itself only carries the heat the peppers provide.
What is the best container for storage?
Use a glass jar with a tight-sealing lid. Glass is non-reactive and won't absorb the pungent odors of the garlic and chili. Ensure the jar is bone-dry before adding the oil to prevent spoilage.